让我们看一下有关如何在 Ubuntu20.04 XAMPP(Apache) 部署免费 Let’s Encrypt 证书的分步指南。
步骤一:参考Let’s Encrypt官方安装文档
Let’s Encrypt官方安装文档:https://certbot.eff.org/lets-encrypt/ubuntufocal-apache
1、SSH 进入服务器
以具有 sudo 权限(root)的用户身份通过 SSH 连接到运行您的 HTTP 网站的服务器。
2、安装 snapd您需要安装 snapd 并确保按照任何说明启用经典 snap 支持。
按照snapcraft 网站上的这些说明安装 snapd。安装 snapd
备注:注意我们是Ubuntu20.04,该系统默认已经安装 snap ,所以这一步我们可以省略!
3、确保您的 snapd 版本是最新的
在Ubuntu的命令行上执行以下说明,以确保您拥有最新版本的snapd。
sudo snap install core
sudo snap refresh core
4、 删除 certbot-auto 和任何 Certbot OS 包 (一般系统之前未安装,可以跳过该步骤)
如果您使用apt、dnf或yum等操作系统包管理器安装了任何 Certbot 包 ,则应在安装 Certbot snap 之前将其删除,以确保在运行命令 certbot 时使用的是 snap,而不是从您的操作系统包安装经理。执行此操作的确切命令取决于您的操作系统,但常见示例是 : sudo apt-get remove certbot, sudo dnf remove certbot, 或者sudo yum remove certbot
如果您之前通过 certbot-auto 脚本使用过 Certbot,您还应该按照此处的说明删除其安装。
5、 安装 Certbot
在ubuntu上的命令行上运行此命令以安装 Certbot。
sudo snap install --classic certbot
6、 准备 Certbot 命令
在Ubuntu上的命令行执行以下指令,确保certbot命令可以运行。
sudo ln -s /snap/bin/certbot /usr/bin/certbot7、 获取证书,运行 Certbot (开始报错了)
运行此命令以获取证书并让 Certbot 自动编辑您的 Apache 配置以提供服务,只需一步即可打开 HTTPS 访问。
sudo certbot --apache输入命令报错如下:Cannot find Apache executable apache2ctl(目前未找到解决方案!)

root@nextcloud2:~# sudo certbot --apache
Saving debug log to /var/log/letsencrypt/letsencrypt.log
The apache plugin is not working; there may be problems with your existing configuration.
The error was: NoInstallationError('Cannot find Apache executable apache2ctl')
root@nextcloud2:~# sudo certbot certonly --apache
Saving debug log to /var/log/letsencrypt/letsencrypt.log
The apache plugin is not working; there may be problems with your existing configuration.
The error was: NoInstallationError('Cannot find Apache executable apache2ctl')
Ask for help or search for solutions at https://community.letsencrypt.org. See the logfile /var/log/letsencrypt/letsencrypt.log or re-run Certbot with -v for more details.
或者 只需获得证书 ,可以使用以下命令。( 手动更改 Apache 配置,请运行此命令。 )
sudo certbot certonly --apache8、 Let’s Encrypt 自动续订 (该步骤待确认)
您系统上的 Certbot 软件包带有一个 cron 作业或 systemd 计时器,它们会在您的证书到期之前自动更新您的证书。除非您更改配置,否则您无需再次运行 Certbot。
您可以通过运行以下命令来测试证书的自动续订:
sudo certbot renew --dry-run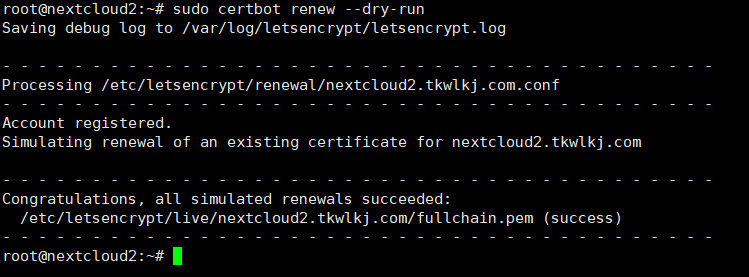
root@nextcloud2:~# sudo certbot renew --dry-run
Saving debug log to /var/log/letsencrypt/letsencrypt.log

- - - - - - - - - - - - - - - - - - - - - - - - - - - - - - - - - - - - - - - -
Processing /etc/letsencrypt/renewal/nextcloud2.tkwlkj.com.conf
- - - - - - - - - - - - - - - - - - - - - - - - - - - - - - - - - - - - - - - -
Account registered.
Simulating renewal of an existing certificate for nextcloud2.tkwlkj.com

- - - - - - - - - - - - - - - - - - - - - - - - - - - - - - - - - - - - - - - -
Congratulations, all simulated renewals succeeded:
  /etc/letsencrypt/live/nextcloud2.tkwlkj.com/fullchain.pem (success)
- - - - - - - - - - - - - - - - - - - - - - - - - - - - - - - - - - - - - - - -
步骤二:
参考文章:https://metablogue.com/enable-lets-encrypt-ssl-aws-lightsail/
我们参考官方文档的第七步获取证书报错,那我们再看一下通过另一种方法来获取证书。
7、生成证书(接上文)
安装 Certbot 客户端后,您可以继续为您的域生成证书。
官方demo:
sudo certbot certonly --webroot -w /opt/bitnami/wordpress/ -d www.example.com -d example.com亲测代码:
sudo certbot certonly --webroot -w /opt/lampp/htdocs/nextcloud2 -d nextcloud2.tkwlkj.com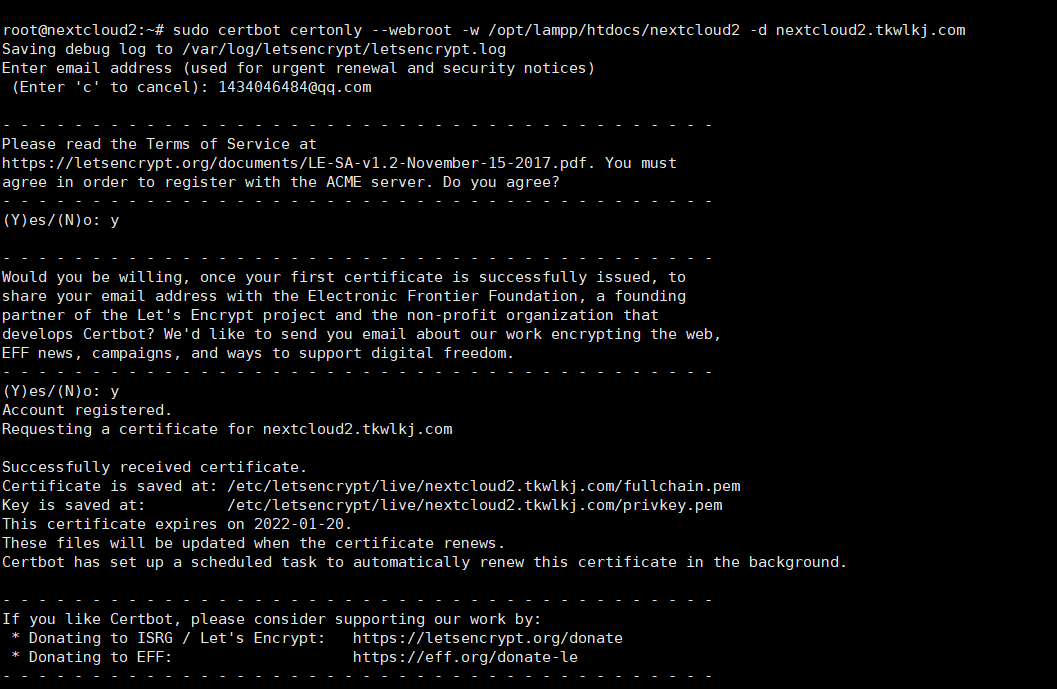
root@nextcloud2:~# sudo certbot certonly --webroot -w /opt/lampp/htdocs/nextcloud2 -d nextcloud2.tkwlkj.com
Saving debug log to /var/log/letsencrypt/letsencrypt.log
Enter email address (used for urgent renewal and security notices)
 (Enter 'c' to cancel): 1434046484@qq.com

- - - - - - - - - - - - - - - - - - - - - - - - - - - - - - - - - - - - - - - -
Please read the Terms of Service at
https://letsencrypt.org/documents/LE-SA-v1.2-November-15-2017.pdf. You must
agree in order to register with the ACME server. Do you agree?
- - - - - - - - - - - - - - - - - - - - - - - - - - - - - - - - - - - - - - - -
(Y)es/(N)o: y

- - - - - - - - - - - - - - - - - - - - - - - - - - - - - - - - - - - - - - - -
Would you be willing, once your first certificate is successfully issued, to
share your email address with the Electronic Frontier Foundation, a founding
partner of the Let's Encrypt project and the non-profit organization that
develops Certbot? We'd like to send you email about our work encrypting the web,
EFF news, campaigns, and ways to support digital freedom.
- - - - - - - - - - - - - - - - - - - - - - - - - - - - - - - - - - - - - - - -
(Y)es/(N)o: y
Account registered.
Requesting a certificate for nextcloud2.tkwlkj.com

Successfully received certificate.
Certificate is saved at: /etc/letsencrypt/live/nextcloud2.tkwlkj.com/fullchain.pem
Key is saved at:         /etc/letsencrypt/live/nextcloud2.tkwlkj.com/privkey.pem
This certificate expires on 2022-01-20.
These files will be updated when the certificate renews.
Certbot has set up a scheduled task to automatically renew this certificate in the background.

- - - - - - - - - - - - - - - - - - - - - - - - - - - - - - - - - - - - - - - -
If you like Certbot, please consider supporting our work by:
 * Donating to ISRG / Let's Encrypt:   https://letsencrypt.org/donate
 * Donating to EFF:                    https://eff.org/donate-le
- - - - - - - - - - - - - - - - - - - - - - - - - - - - - - - - - - - - - - - -
备注: 将域名更改为您的域名。
如果您需要多个域的证书,您可以使用 -d 选项添加其他域。在其官方页面上查看有关 Certbot 客户端的更多信息。
它将生成的证书存储在 / etc/letsencrypt/live/DOMAIN目录中,其中 DOMAIN 将是上述命令中使用的第一个域名。
您应该始终在证书中包含 www 和非 www 域。需要这样做是因为某些浏览器不会进行自动重定向,用户将收到安全错误。因此,在证书中包含域的两个版本很有用。
如果您已经生成了 SSL 证书,请再次发出上述命令。它将询问您是否要通过包含其他域来扩展现有证书。键入“E”进行扩展,它将重新生成证书。
8、链接 Let’s Encrypt 证书 到 Apache
您可以使用上述任何一种来生成 SSL 证书。获得证书后,您必须让 Apache 知道它可以在哪里获取它。
默认情况下,Apache 将证书存储在下面提到的位置
/opt/lampp/etc/ssl.crt/server.crt
/opt/lampp/etc/ssl.key/server.key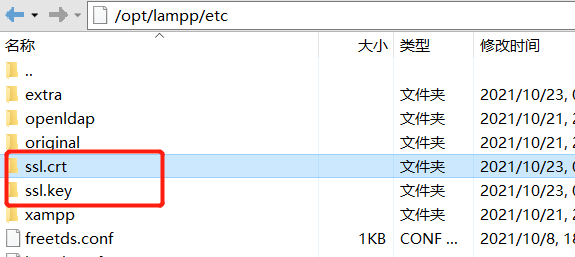
您可以在这些位置复制您的 SSL 证书并重新启动 Apache 以启用新文件。但是使用这种方法,您在续订证书时必须再次复制文件。
所以更好的方法是创建一个指向证书文件的符号链接。每当您续订许可证时,它无需此额外步骤即可生效。
首先,我们需要删除现有的证书文件(即删除/opt/lampp/etc/ssl.crt/server.crt;/opt/lampp/etc/ssl.key/server.key
),以便我们可以轻松地创建链接。
但是我们强烈建议大家在服务器不要随意删除文件,即使像现在要删除文件,一定先重命名(也叫备份)再删除源文件。所以可以使用下面命令,直接把上面两个文件重命名即可。(相当于备份后删除操作!)
sudo mv /opt/lampp/etc/ssl.crt/server.crt /opt/lampp/etc/ssl.crt/server.crt.old
sudo mv /opt/lampp/etc/ssl.key/server.key /opt/lampp/etc/ssl.key/server.key.old然后,您可以使用以下命令来创建链接。确保证书文件名和路径正确。[DOMAIN] 需要替换为证书颁发命令中使用的第一个域。
sudo ln -sf /etc/letsencrypt/live/nextcloud2.tkwlkj.com/fullchain.pem /opt/lampp/etc/ssl.crt/server.crt
sudo ln -sf /etc/letsencrypt/live/nextcloud2.tkwlkj.com/privkey.pem /opt/lampp/etc/ssl.key/server.key 当您的链接就位,还需要配置一下/opt/lampp/etc/extra文件夹下的httpd-ssl.conf个文件。(配置完成访问https://nextcloud2.tkwlkj.com才生效!)
只需要配置如下两行信息:
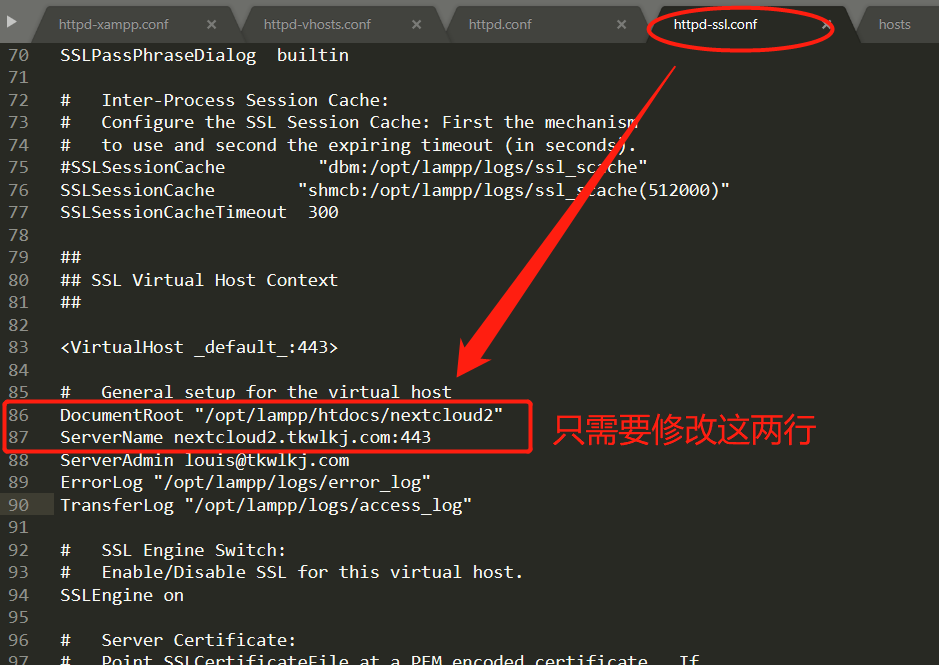
##
## SSL Virtual Host Context
##

<VirtualHost _default_:443>

#   General setup for the virtual host
DocumentRoot "/opt/lampp/htdocs/nextcloud2"   //(第83行)修改
ServerName nextcloud2.tkwlkj.com:443         //(第84行)修改
ServerAdmin louis@tkwlkj.com
ErrorLog "/opt/lampp/logs/error_log"
TransferLog "/opt/lampp/logs/access_log"

#   SSL Engine Switch:
#   Enable/Disable SSL for this virtual host.
SSLEngine on
现在,您可以重新启动 Apache 服务器以使其生效。使用以下命令重新启动 Apache 服务器。
/opt/lampp/lampp restartapacheApache 重启后,您可以尝试通过 HTTPS 访问您的应用并确保没有错误。
到这一步,你是可以通过http和https两种方式访问应用,如何强制都转换成https呢?参考:https://metablogue.com/enable-lets-encrypt-ssl-aws-lightsail/
补充:2021/10/23
如果我要在服务器上部署多个站点,SSL证书又是怎么申请,服务器怎么部署?
如果您一次获得多个域的证书,插件需要知道每个域的文件是从哪里提供的,这可能是每个域的单独目录。为多个域申请证书时,每个域将使用最近指定的--webroot-path. 所以,例如:
官方demo
certbot certonly --webroot -w /var/www/example -d www.example.com -d example.com -w /var/www/other -d other.example.net -d another.other.example.net实例(亲测)
sudo certbot certonly --webroot -w /opt/lampp/htdocs/nextcloud2 -d nextcloud2.tkwlkj.com -w /opt/lampp/htdocs/suitecrm2 -d suitecrm2.tkwlkj.com命令行执行代码如下:
root@nextcloud2:/# sudo certbot certonly --webroot -w /opt/lampp/htdocs/nextcloud2 -d nextcloud2.tkwlkj.com -w /opt/lampp/htdocs/suitecrm2 -d suitecrm2.tkwlkj.com
Saving debug log to /var/log/letsencrypt/letsencrypt.log
Requesting a certificate for nextcloud2.tkwlkj.com and suitecrm2.tkwlkj.com

Successfully received certificate.
Certificate is saved at: /etc/letsencrypt/live/nextcloud2.tkwlkj.com-0001/fullchain.pem
Key is saved at:         /etc/letsencrypt/live/nextcloud2.tkwlkj.com-0001/privkey.pem
This certificate expires on 2022-01-21.
These files will be updated when the certificate renews.
Certbot has set up a scheduled task to automatically renew this certificate in the background.

- - - - - - - - - - - - - - - - - - - - - - - - - - - - - - - - - - - - - - - -
If you like Certbot, please consider supporting our work by:
 * Donating to ISRG / Let's Encrypt:   https://letsencrypt.org/donate
 * Donating to EFF:                    https://eff.org/donate-le
- - - - - - - - - - - - - - - - - - - - - - - - - - - - - - - - - - - - - - - -
系统会把两个域名nextcloud2.tkwlkj.com和suitecrm2.tkwlkj.com证书都存在/etc/letsencrypt/live/nextcloud2.tkwlkj.com-0001这个文件夹下。
接下来重新对/etc/letsencrypt/live/nextcloud2.tkwlkj.com-0001文件夹下的证书链接就可以,链接方式参考上文,具体代码如下:
sudo ln -sf /etc/letsencrypt/live/nextcloud2.tkwlkj.com-0001/fullchain.pem /opt/lampp/etc/ssl.crt/server.crt
sudo ln -sf /etc/letsencrypt/live/nextcloud2.tkwlkj.com-0001/privkey.pem /opt/lampp/etc/ssl.key/server.key
命令行运行代码如下:
root@nextcloud2:/# sudo ln -sf /etc/letsencrypt/live/nextcloud2.tkwlkj.com-0001/fullchain.pem /opt/lampp/etc/ssl.crt/server.crt
root@nextcloud2:/# sudo ln -sf /etc/letsencrypt/live/nextcloud2.tkwlkj.com-0001/privkey.pem /opt/lampp/etc/ssl.key/server.key最后一步就是httpd-ssl.conf文件,可以在httpd-ssl.conf源文件上修改,也可以参照如下的 httpd-ssl.conf 配置做修改。
Listen 443

<VirtualHost *:443>
	 DocumentRoot "/opt/lampp/htdocs/nextcloud2"
	 ServerName nextcloud2.tkwlkj.com:443
	 ServerAlias nextcloud2.tkwlkj.com
	 SSLEngine on
	 SSLProtocol TLSv1 TLSv1.1 TLSv1.2
	 SSLCipherSuite HIGH:MEDIUM:!aNULL:!MD5
	 SSLCertificateFile "/opt/lampp/etc/ssl.crt/server.crt"
	 SSLCertificateKeyFile "/opt/lampp/etc/ssl.key/server.key"

</VirtualHost>

<VirtualHost *:443>
	 DocumentRoot "/opt/lampp/htdocs/suitecrm2"
	 ServerName suitecrm2.tkwlkj.com:443
	 ServerAlias suitecrm2.tkwlkj.com
	 SSLEngine on
	 SSLProtocol TLSv1 TLSv1.1 TLSv1.2
	 SSLCipherSuite HIGH:MEDIUM:!aNULL:!MD5
	 SSLCertificateFile "/opt/lampp/etc/ssl.crt/server.crt"
	 SSLCertificateKeyFile "/opt/lampp/etc/ssl.key/server.key"

</VirtualHost>
以上配置完成后,重启apache!
/opt/lampp/lampp restartapache完成!
多站点配置SSL参考文档:https://certbot.eff.org/docs/using.html#apache